Azure Management Api | Part Two
In part one of my guide, we set up an app registration within the Azure Portal for us to use as the authenticated set of credentials for managing Azure resources via the management API.
In part two, we’ll look at how we can put these to use to manage our resources via the API.
Having an understanding of the API is important, in my opinion, because it’s how everything from the Az Cli to Terraform interacts with the Azure backend.
So, let’s get started…
API Clients
Now, there are a myriad of choices for API clients - you can obviously create requests programmatically with something like PowerShell or Python, or you can use something a little more user friendly for testing. For this second purpose, I tend to use the well-established Postman so that’s what I’ll be using here. I won’t go into a huge Postman overview because there are numerous resources out there who have done a far better job than I could ever do. So just be aware that Postman is what I’m using throughout this guide but the functionality will likely be there in other clients.
First Step: Environment
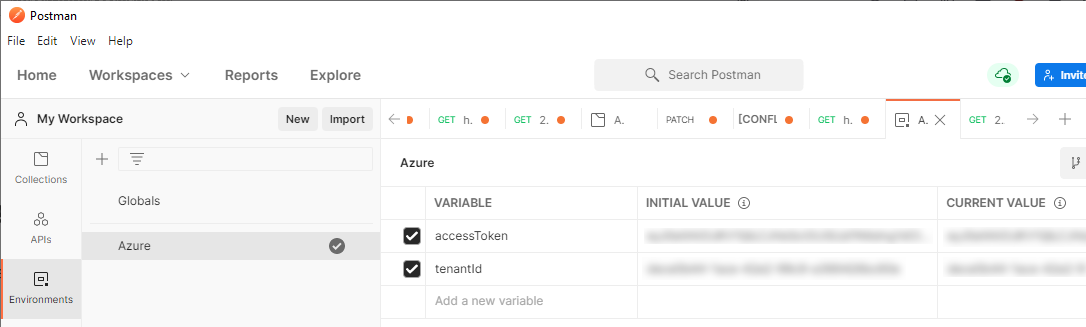
The first thing I like to do is create an ‘Environment’ within Postman. This lets me store common variables to be used throughout API requests.
You’ll need to find your tenantId from AzureAD and populate that. Next, create a variable called accessToken. The initial value can be anything; we’ll overwrite it shortly…
Second Step: Obtain Token
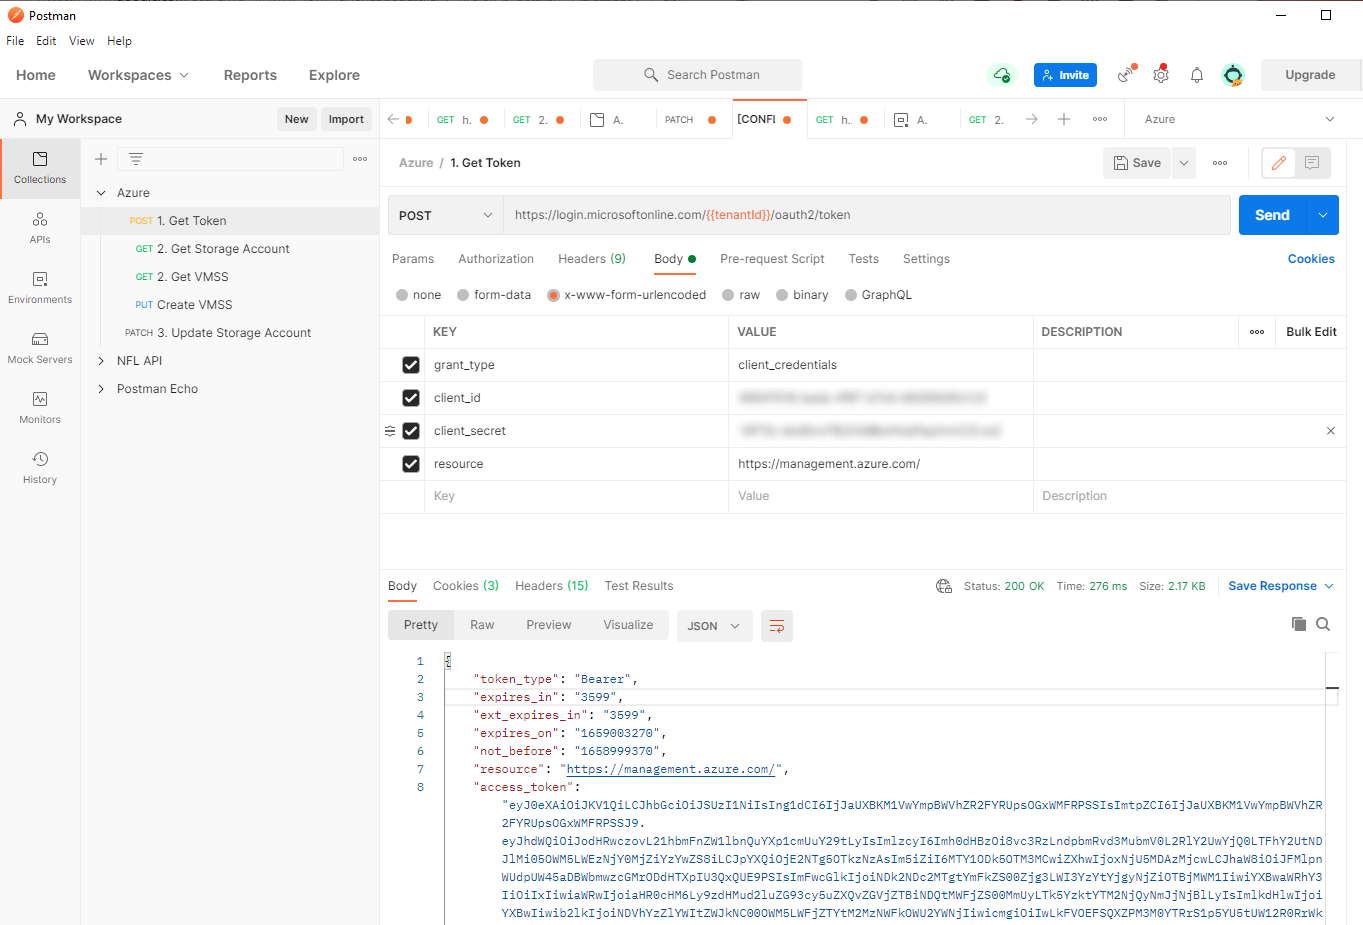
In part one of this guide we created our App Registration and saved our Client Id and Client Secret. This pairing is what we will use to request an Access Token from Azure. This can be confusing at first because you might think the pairing is analogous to a traditional interactive username/password pairing. In reality though, it’s only used here to obtain a short lived Access Token. For that reason, setting up this first request is the first real stage in our API request flow.
To obtain the Access Token, you’ll need to send a POST request to the endpoint https://login.microsoftonline.com/{{tenantId}}/oauth2/token where {{tenantId}} is the tenantId variable we set up in our environment previously.
This endpoint will expect x-www-form-urlencoded data with four key:value pairs. Two of these are our Client ID and Secret, the others are the ‘grant_type’ and ‘resource’ types. For our purposes, these are ‘client_credentials’ and ‘ https://management.azure.com/' respectively.
All being well, a POST request as described above should return an Access Token for us to use. This is shown below, along with our config.
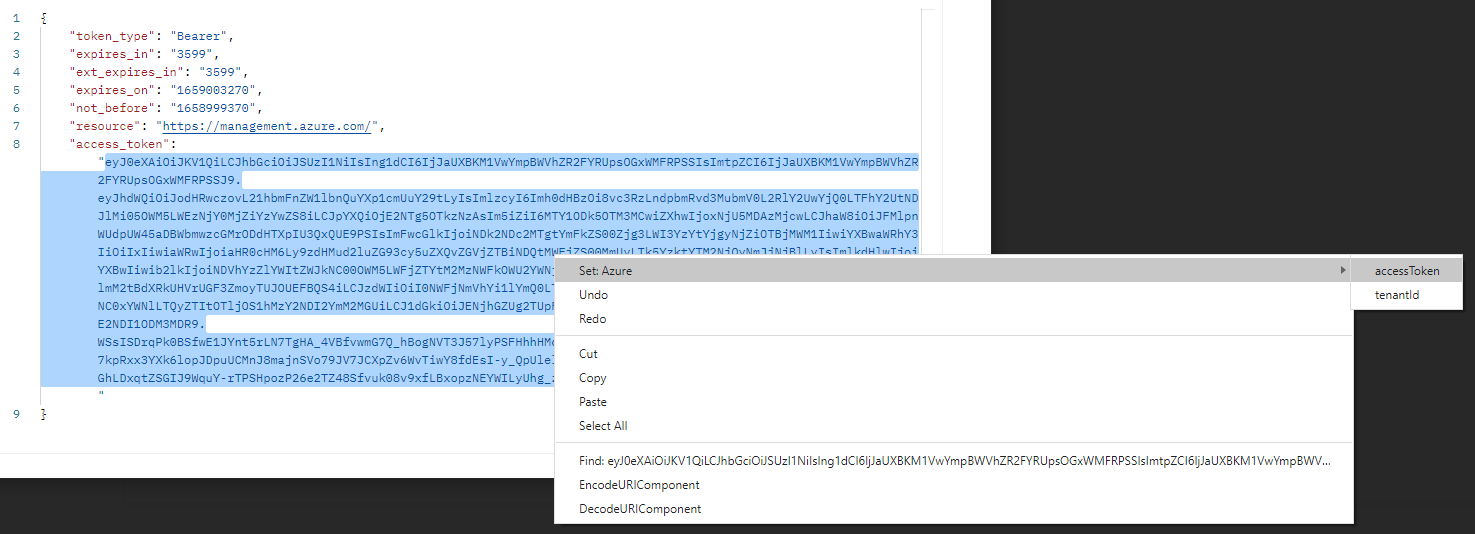
In the second screenshot, I am selecting the value of the ‘access_token’ and setting my accessToken variable directly from the response, which will allow us to easily access it later on. Setting variables in Postman means you avoid having to change parameters every time you send requests.
Third Step: Get a Resource
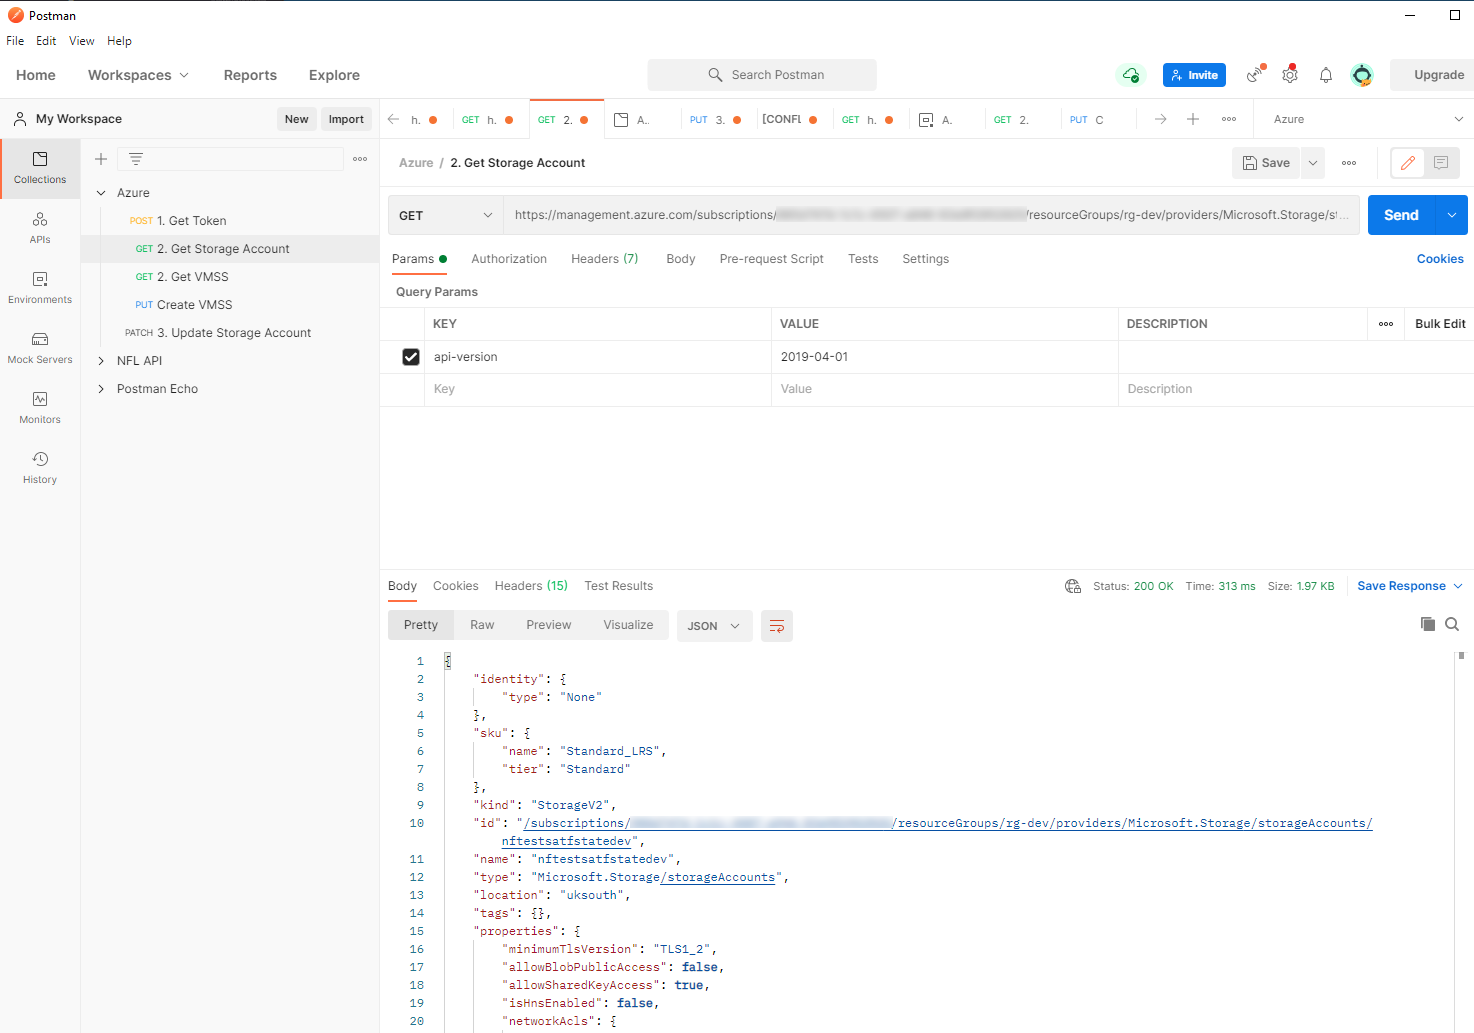
Now we have our Access Token set up we can make some requests. To start, the easiest thing to do is to get the details of a resource. This is done by sending a GET request to the endpoint https://management.azure.com/subscriptions/{subId}/resourceGroups/{resourceGroupName}/providers/{resourceNameSpace}/{resourceType}/{resourceName}
One parameter you do need to specify is the api-version. This can be found by checking the ‘JSON View’ of your resource in the Azure Portal.
Below we can see my set up, including response. I have hardcoded the entire URL but you could just as easily use environment variables again.
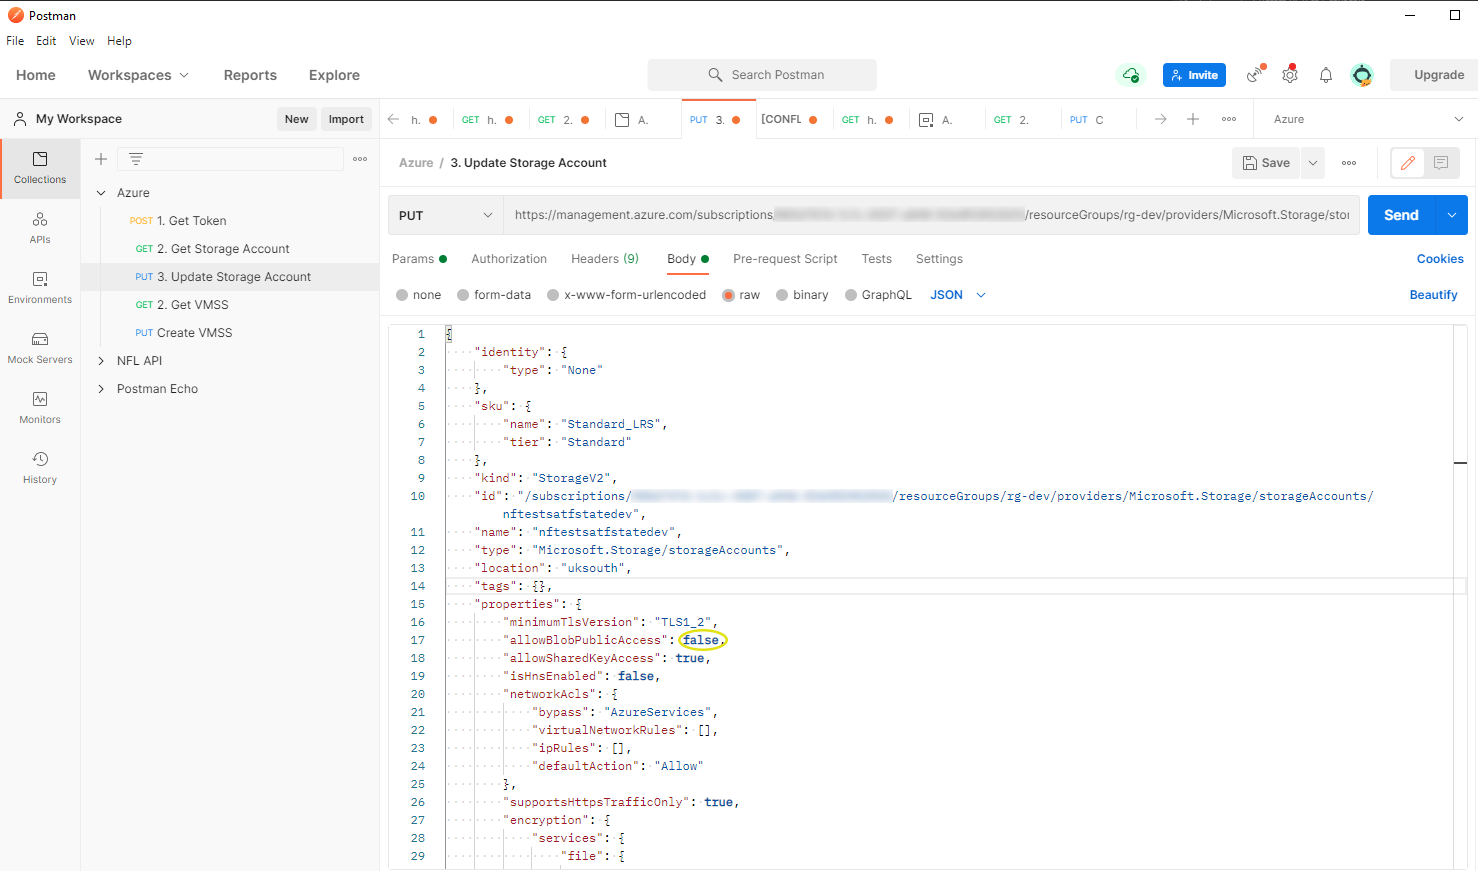
Fourth Step: Create/Update a Resource
If we want to change any properties of our resource we can simply copy the response body into a new request, send to the same endpoint, and change the HTTP method to either PATCH or PUT.
The Management endpoint doesn’t support POST requests and the reason for this is that POST requests are not idempotent. So for that reason, creating new resources is done with the much safer PUT method.
So, if we can use only PUT to create, and either PATCH or PUT to update a resource, it makes sense to just default to PUT for any requests other than GET. That way, you’ll know that your request will work to either update or create a new resource, depending on whether it already exists or not.
The screenshot below shows me taking the output of my previous request and simply changing the value of allowBlobPublicAccess to false.
That’s About It
Once you know the process, it’s not really super complicated and knowing how this all works can be really quite useful when it comes to getting a deeper understanding of things like Az Cli and Terraform, which are essentially (quite fancy) Python and Go wrappers for the API.
Comments
comments powered by Disqus